Developing
Configuration Files


This is literally the robot hardware configuration written in yaml.
These are provided as reference for use by pit crew.
Use this to confirm/reconfigure motor controller addresses or examine if pose x/y cords match actual.
# This file defines the robot's
# physical dimensions. Things like
# Motor placement, max and min extensions
# of arms, and similar should go here.

drivetrain:
  max_velocity: 1.5         # Updated 2/19/22 by Joe
  min_velocity: 0.075       # Updated 2/19/22 by Joe

  # All pose coordinates are in meters.
  fp_module: # Fore Port
    pose_x: 0.517525        # Updated 2/21/22 by Joe
    pose_y: 0.3048          # Updated 2/21/22 by Joe
    drive_id: 5             # Updated Week 0 by Joe
    steer_id: 6             # Updated Week 0 by Joe
    drive_inverted: false   # Updated 2/21/22 by Joe
    steer_inverted: false   # Updated 2/21/22 by Joe
    zeroSwitchID: 1         # Updated 4/6/22 by Joe

  fs_module: # Fore Starboard
    pose_x: 0.517525        # Updated 2/21/22 by Joe
    pose_y: -0.3048         # Updated 2/21/22 by Joe
    drive_id: 1             # Updated Week 0 by Joe
    steer_id: 2             # Updated Week 0 by Joe
    drive_inverted: true    # Updated 2/21/22 by Joe
    steer_inverted: false   # Updated 2/21/22 by Joe
    zeroSwitchID: 2         # Updated 4/6/22 by Joe

  ap_module: # Aft Port
    pose_x: -0.517525       # Updated 2/21/22 by Joe
    pose_y: 0.3048          # Updated 2/21/22 by Joe
    drive_id: 7             # Updated Week 0 by Joe
    steer_id: 8             # Updated Week 0 by Joe
    drive_inverted: false   # Updated 2/21/22 by Joe
    steer_inverted: false   # Updated 2/21/22 by Joe
    zeroSwitchID: 0         # Updated 4/6/22 by Joe

  as_module: # Aft Starboard
    pose_x: -0.517525       # Updated 2/21/22 by Joe
    pose_y: -0.3048         # Updated 2/21/22 by Joe
    drive_id: 3             # Updated Week 0 by Joe
    steer_id: 4             # Updated Week 0 by Joe
    drive_inverted: false   # Updated 2/21/22 by Joe
    steer_inverted: false   # Updated 2/21/22 by Joe
    zeroSwitchID: 3         # Updated 4/6/22 by Joe

  imu: # IMU Sensor
    can_id: 0
    yaw: 0
    pitch: 0
    roll: 0

yoke:
  # Constants for shooter motors
  star_shooter_id: 13           # Updated Week 0 by Joe
  port_shooter_id: 12           # Updated Week 0 by Joe

  # Constants for yoke motors and other sensors
  primary_motor_id: 10          # Updated 5/7/22 by Joe
  auxillary_motor_id: 9         # Updated 5/7/22 by Joe

  # Constants for kicker
  kicker_id: 11                 # Updated Week 0 by Joe

  #diameter of the wheel in meters
  wheel_diameter: 0.09779

  # Maximum speed when driving the yoke without PID
  max_raw_speed: 0.3            # Updated never by Khan

  # Motor inversions
  star_shooter_invert: false    # Updated 02/24/22 by Joe
  port_shooter_invert: true     # Updated 02/24/22 by Joe
  primary_yoke_invert: true     # Updated 02/24/22 by Joe
  aux_yoke_invert: false        # Updated 02/24/22 by Joe
  kicker_invert: true           # Updated 02/24/22 by Joe

  low_target_speed: 85          # Updated Never by Khan
  low_target_angle: 0.25        # Updated Never by Khan

  high_target_speed: 80         # Updated Never by Khan
  high_target_angle: 0.5        # Updated Never by Khan

climber:
  port_climber: 17              # Updated 4/2/22 by Khan
  starboard_climber: 18         # Updated 4/2/22 by Khan

  pid:
    kp: 1                       # updated 2/17/22 by keegan
    ki: 1                       # updated 2/17/22 by keegan
    kd: 1                       # updated 2/17/22 by keegan
    maxi: 1                     # updated 2/17/22 by keegan
    min_power: -0.85            # updated 2/17/22 by keegan
    max_power: 0.85             # updated 2/17/22 by keegan
    ratio: 0.033                # updated 2/17/22 by keegan


misc:
  # Misc hardware settings
  CANdle:
    can_id: 0           # Updated 2/3/22 by Joe
    strip_type: RGB     # Updated 2/3/22 by Joe
    brightness: 0.5     # Updated 2/4/22 by Joe
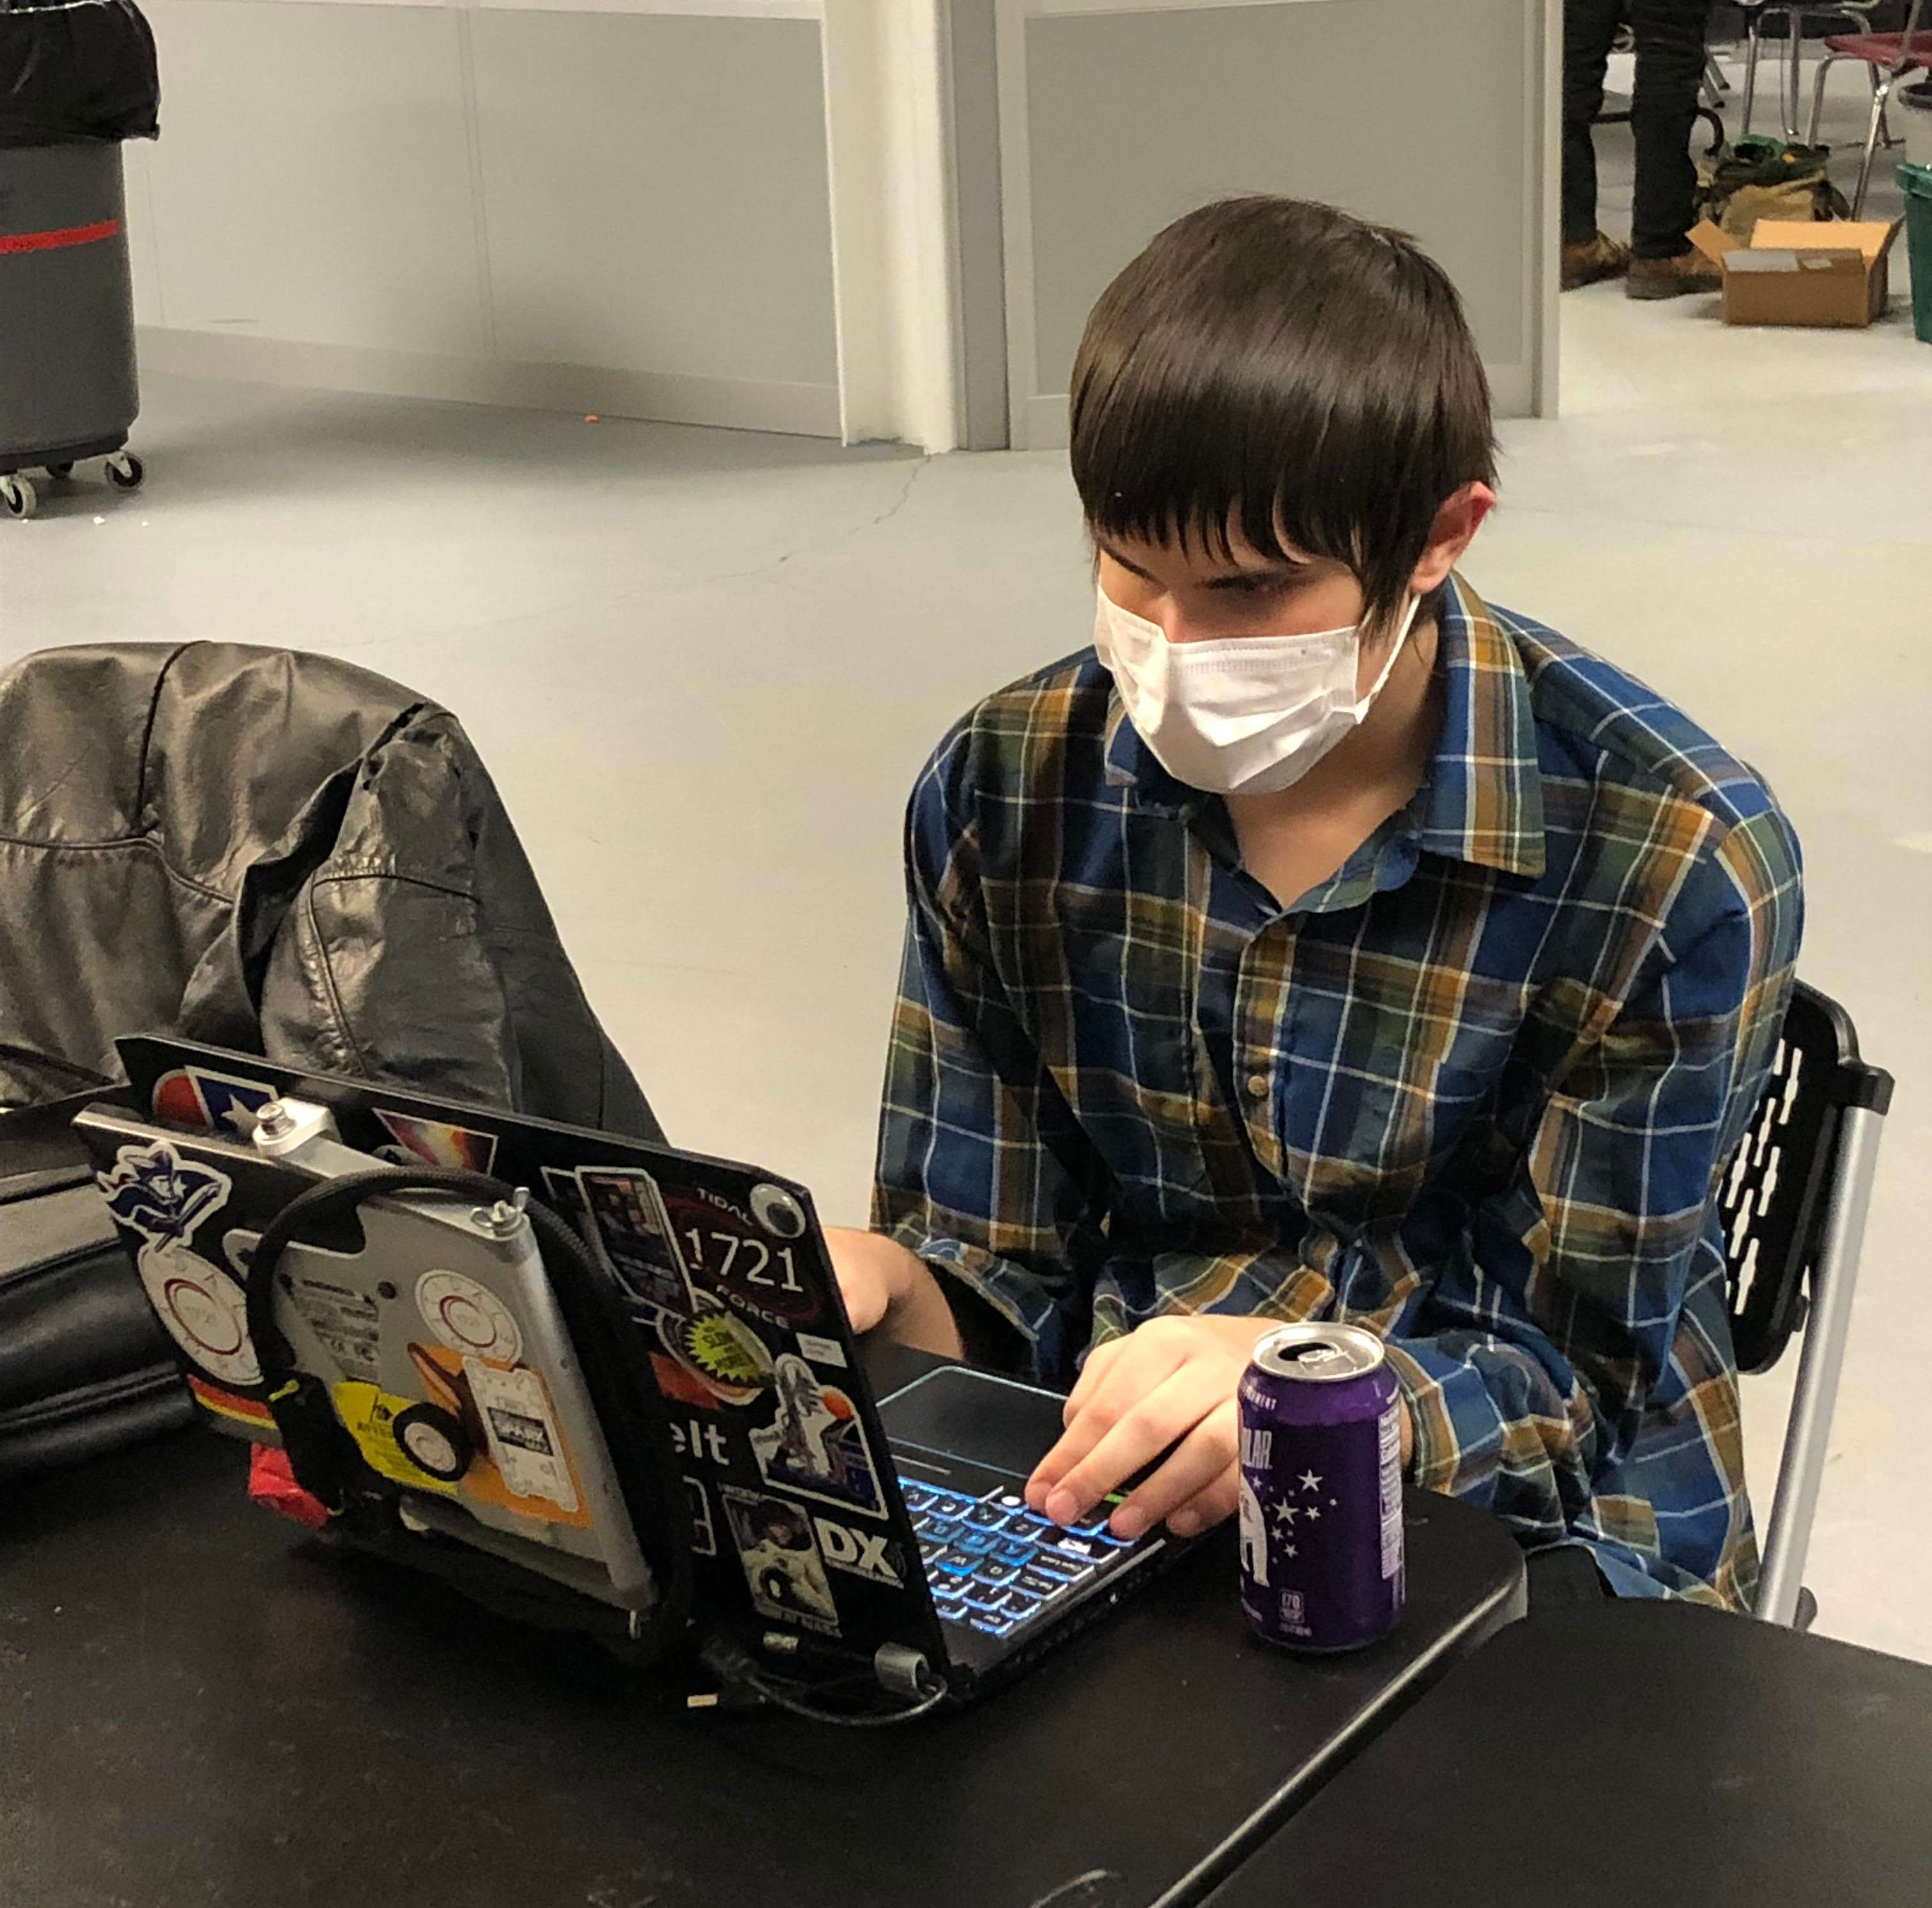
A programmer in his natural habitat
Getting started modifying these docs
Requirements for building the docs
You’ll need to install several packages to build these docs
# Ubuntu/Debian users
sudo apt install texlive-latex-recommended texlive-latex-extra texlive-pictures pandoc rename latexmk
if any issue occur during the installation proccess first try googling the issue, then asking Khan or Joe.
Making the docs
Under the Docs directory in pre2022season, setup a pipenv using the
provided files and invoke the make latexpdf command to build the docs.
pipenv install # May take a while
pipenv shell
make latexpdf # Builds the manual
Find the generated .pdf under docs/_build/latex/
it is recommended that you also have a restructured text interperter such as reStructuredText.
Documentation for sphinx can be found here
Git
While most git commands are in git documentation here, here are a few basic commands you should know.
git clone <url>(clones a repository for you to use yourself, the https you can find by going to a github repository and clicking code the first option should be https. Copy that and then run the command.)git add -A(adds all changes to the version you would commit.)git status(tells you what files are changed and not yet added with git add)git commit -m "message"(puts all changes added into a commit with a message that you made.)git push(Push to upstream)git pull(Pull from upstream)git checkout <hash/branch name/tag>(Checkout a specific revision or branch)git stash(Stows your current changes for later) *git stash apply(apply your stashed changed) *git stash drop(clears the current stashed changes)git branch "new branch name"(Checkout to a new branch)git rebase <branch path>(this helps with not being able to push)git reset --hard(this command is a nuclear option, reverting back commits BE CAREFUL)
Examples for each in order are:
git clone https://github.com/FRC-1721/1721-RapidReact.git
git add -A
git status
git commit -m "added git subsection"
git push
git pull
git checkout 13020ab
git stash
git stash apply
git stash drop
git branch "DevDocs"
git rebase origin/DevDocs
git reset --hard
Please note that git push will not work on main and doesn’t automatically create a pull request,
to see how to use github see Using Github.
Using Github
We use Github to store all our files, our repo is FRC-1721 to get on the github get Khan or Joe to add you.
Making Pull requests
While you will mostly interact with github through git you should know how to make pull requests.
First go to the current repo 1721 RapidReact.
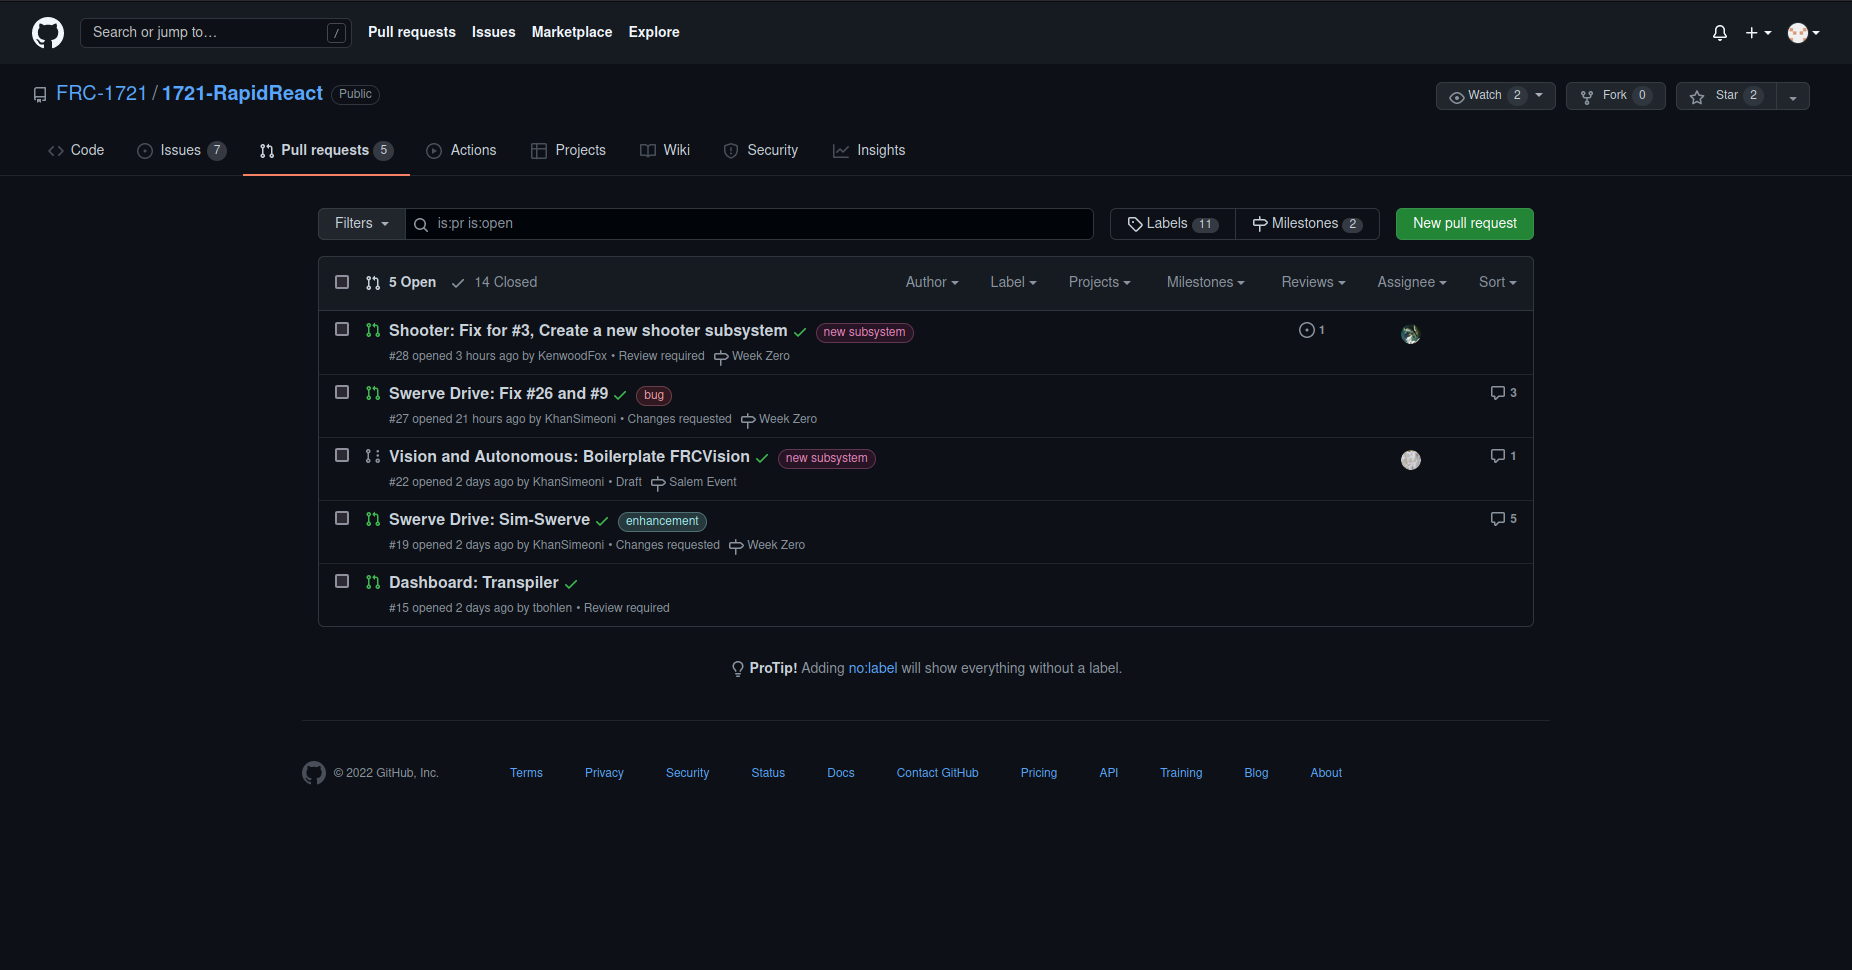
You first under the pull requests tab create a new pull request, select the branch you want to make the pull request for.
At the bottom of the page once approved by someone with proper clearence current Khan, Joe, or Turner you may merge it, please squash and merge to not have billions of commits in main.
Creating Issues
This will go over creating github issues, github issues are one way we communicate what needs to be done.
On the issues tab there will be a button saying New issue, click that and enter the information about the issue.
Making and Adding Labels and Milestones
Labels and Milestones are a nice way to catagorize issues and pull requests, they both can created and added the same way.
To create a Label or Milestone on the main page of issues or pull requests there are buttons, saying Labels and Milestones.
After pressing input a name and a description, github uses a hex system for colors to help select a color use this.
Robot Simulator
Requirements
Under the rio directory setup a pipenv using the provided files
and invoke the make sim command to run the simulator.
pipenv install # May take a while
pipenv shell
make sim # Alternatively run: python3 robot.py sim
This will start the robot simulator. See Using the Simulator for more info.
Using the Simulator
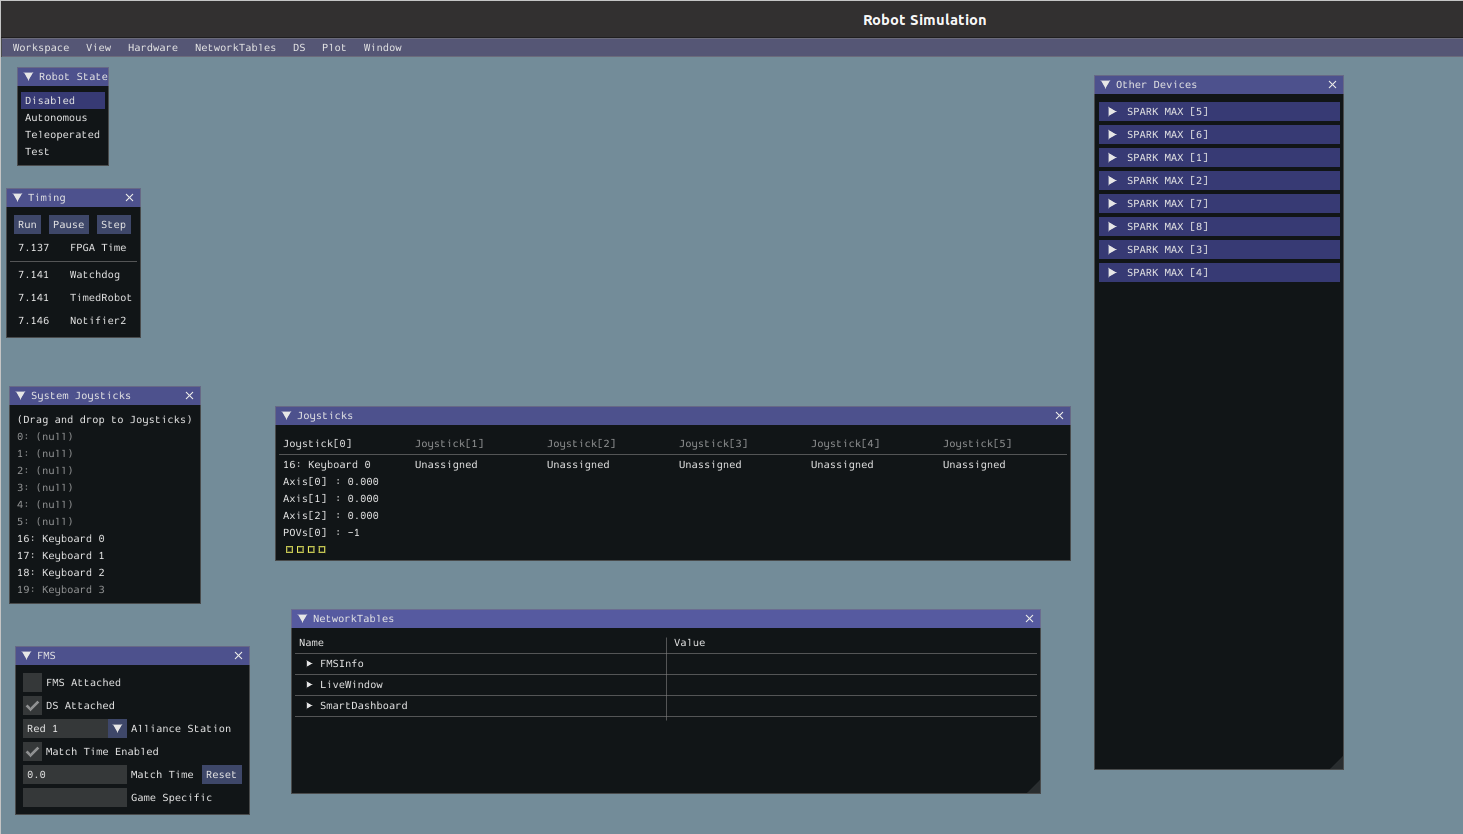
To be able to “operate” the robot while any mode will work it is recommended that under robot state, Teleoperated is enabled.
Under the Joysticks there will be Joysticks 1-5 all grayed out, to select one go to System Joysticks and drag on over.
When starting up the program there will be no input method selected under System Joysticks there may be Joysticks, Xbox controllers, or Keyboards 0-3.
Joysticks and Xbox controllers work as if piloting an actual robot, to find layouts for controls see Controller Map.
Keyboard 0 is the WASD keys to move and E and R to rotate the controller buttons 1 through 4 can be access by Z,X,C,V in that order.
Keyboards 1-3 are differing controller schemes that are useless for the purposes of testing due to lack of movement.
Keyboard inputs require you to have the active window be the simulator while, Joysticks and xbox controllers don’t.
Dashboard

Dashboard Requirements
Under the dashboard directory setup a pipenv using the provided files
and invoke the make run command to start the Dashboard’s local host.
pipenv install # May take a while
pipenv shell
make run # makes a locally hosted website dashboard
This will start the website dashboard. See Using the Dashboard for more info.
Using the Dashboard
Activating the dashboard doesn’t automatically start. To start the Dashboard within your terminal it will print
cd www && python -m pynetworktables2js
16:32:28:683 INFO    : dashboard           : Connecting to NetworkTables at Ip address
16:32:28:683 INFO    : nt                  : NetworkTables initialized in client mode
16:32:28:683 INFO    : dashboard           : NetworkTables Initialized
16:32:28:684 INFO    : dashboard           : Listening on http://localhost:5800/
16:32:28:978 INFO    : tornado.access      : 101 GET /networktables/ws (Ip address) 0.89ms
16:32:28:978 INFO    : net2js              : NetworkTables websocket opened
Within this you will see one called local host, you will need to copy that link and put it in a web browser. It is recommened that you use this in incognito due to network cache causing issues with not updating.
This will auto conntect to the simulation if one is running, if you start one after remember to refresh the page.
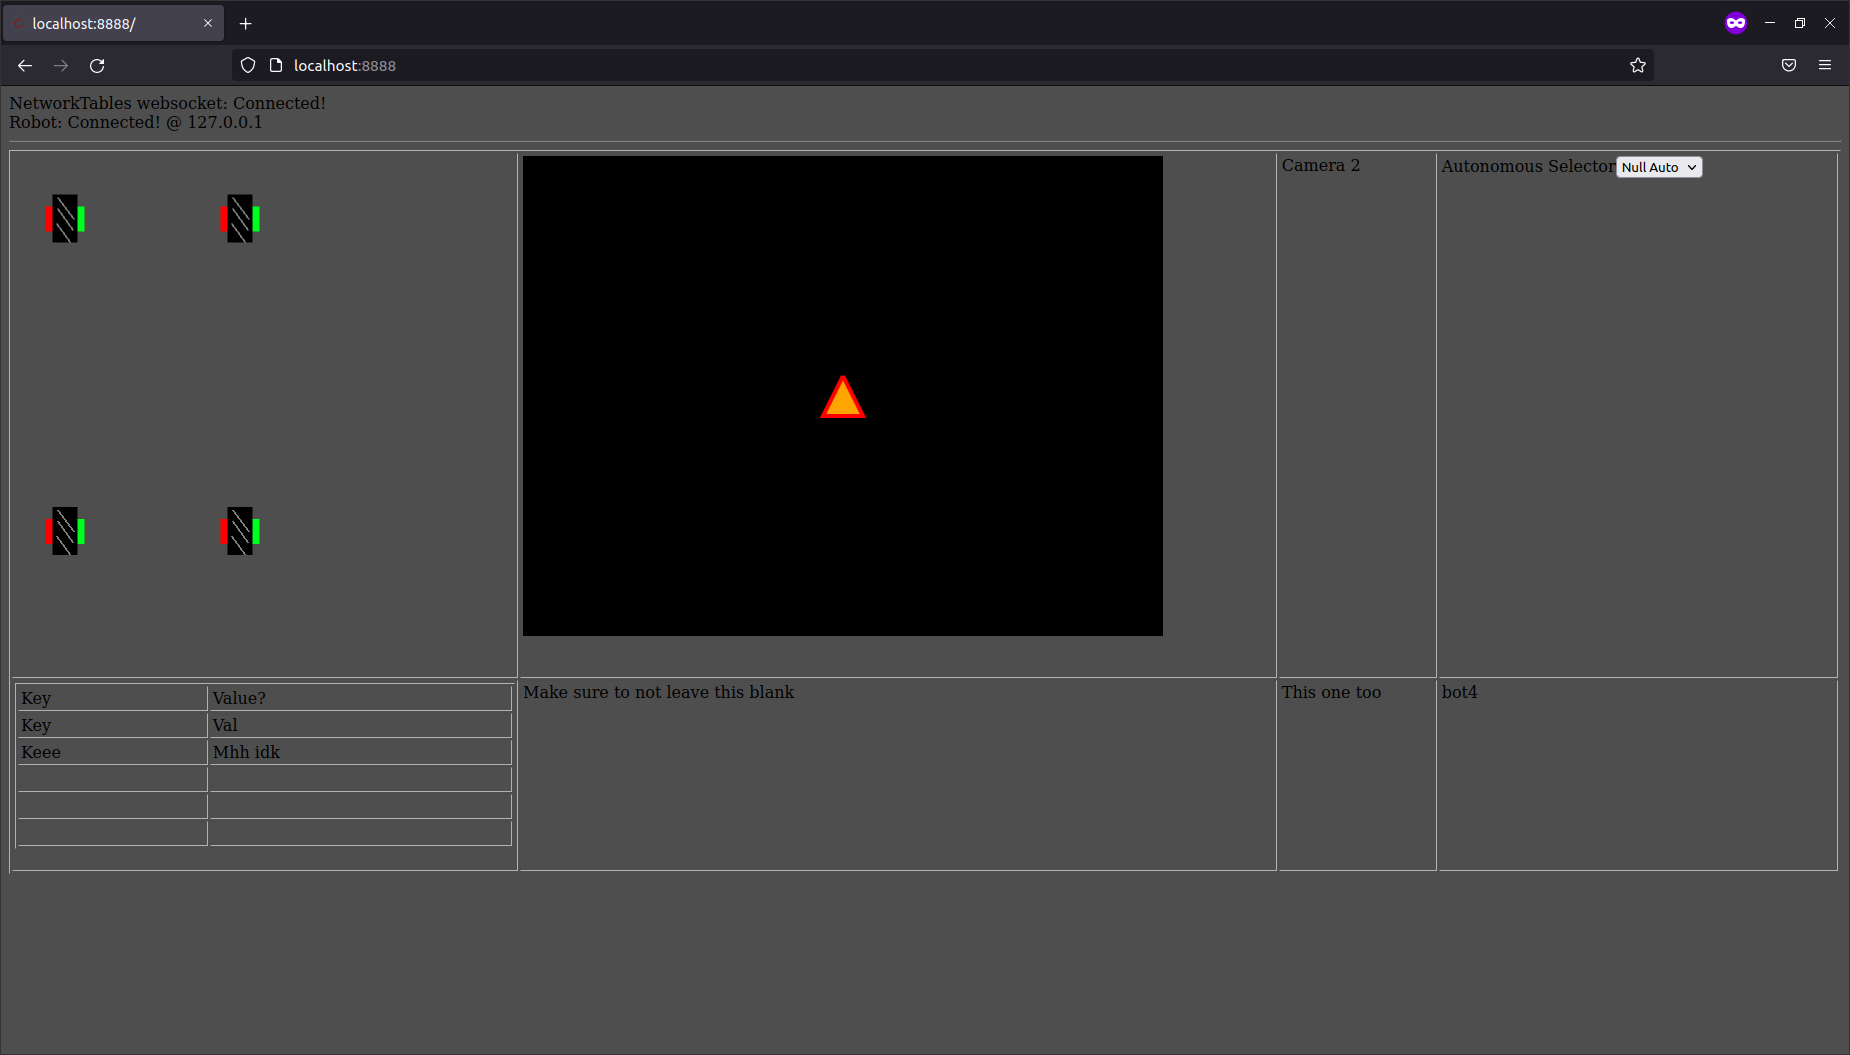
For this station to active things such as the swerve drive wheels, the simulation must be set to Teleoperated see Using the Simulator.
In the top left there will display a simulation of the swerve drive wheels.
To see the simulation of the swerve drive you first must turn the wheels.
In the top right there is an autonomous selector where autonomous may be selected.
There is also a camera that are on the bot.
Robot code
Deploying code
First remember to have the FRC Driver Station open first otherwise this won’t work properly.
To deploy robot code first go to the rio setup a pipenv
and invoke the make deploy
pipenv install # this may take some time
pipenv shell
make deploy # this run python3 robot.py deploy
First time running it will ask for a team number (1721). After the first time it will know the team number deploy the code.
FRC Driver Station

Q driver Station
The FRC Driver Station is made for windows, but there is a linux version Q Driver Station.
This will assume your using the windows version but they both mostly the same.
Most of this won’t be in your control during competitions, but this will go over it all.
The base mode is Teleoperated but you can also set it to Autonomous, practice, and test.
Autonomous will simulate code that would be run in Autonomous. Practice will simulate competition timings, for testing use Teleoperated or in sim, see Robot Simulator. Test, tests the code a better way to test is Robot Simulator.
You can enable the robot after a joystick is detected, make sure to plug one in, it has robot code, and has communications with the robot.
You may also change which Team Station your at, this changing nothing, unless using something like the CANdle that changes color based on team.
Also see Dashboard for a dashboard.